Save $0.25 per watt on solar installs for a limited time
Menu
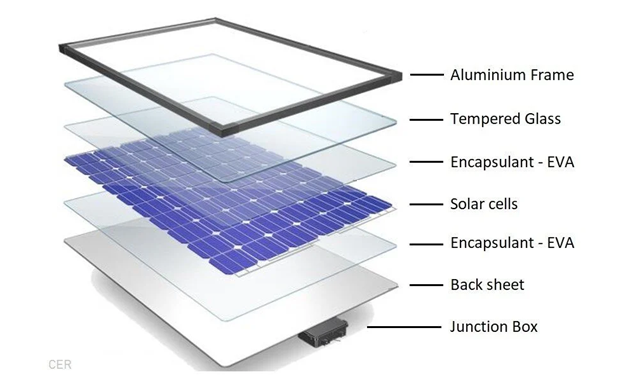
Solar Module: Deconstructed
Solar panels are usually treated like a single piece of equipment. But if you break one down, it becomes clear it’s a system made up of several materials, each with its own role.
Starting at the top, the aluminum frame gives the module its structure and allows it to be mounted securely to a roof or racking system. It’s formed through aluminum extrusion, where heated aluminum is pushed through a die to create a consistent cross-sectional shape. That’s what gives panels their clean, uniform edges. Aluminum is used because it’s lightweight, corrosion-resistant, and strong enough to handle decades of wind, snow, and thermal movement. It’s also one of the most recyclable components in the system, with recycling requiring far less energy than producing it from raw material.
Just beneath the frame is the tempered glass. This is low-iron, high-transparency glass designed to maximize light transmission while still protecting everything underneath. The tempering process strengthens the glass by putting its surface into compression, allowing it to handle impact, temperature swings, and long-term UV exposure. Glass makes up most of the panel’s mass, and it’s also one of the easiest materials to recover and reuse. That’s why recycled glass, including material from older panels, is starting to show up in newer modules.
Below the glass is the first encapsulation layer, typically made from EVA, or ethylene-vinyl acetate. This is a polymer sheet that becomes permanently bonded during lamination when heat and pressure are applied. Its role is to hold the cells in place and protect them from moisture, oxygen, and mechanical stress. At the same time, it has to remain optically clear and stable over decades of exposure, which is why material quality matters here more than people realize.
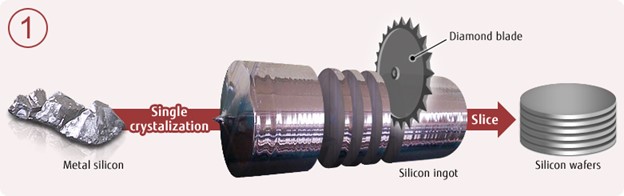
At the center of the module are the solar cells, and this is where the actual energy conversion happens. These cells are cut from monocrystalline silicon ingots into thin wafers. The silicon is refined and then doped with elements like boron and phosphorus to create a p-n junction, which allows the cell to generate electricity when exposed to sunlight. Each individual cell produces a relatively small voltage, so they’re connected together in series using thin copper ribbons that are soldered onto busbars. This creates strings of cells that bring the voltage up to usable levels.
Beneath the cells is a second encapsulation layer, again typically EVA, which mirrors the top layer and completes the protective “sandwich.” During lamination, these layers bond everything together into a single, sealed unit, eliminating air gaps and helping prevent moisture intrusion. This step is critical, because once sealed, the module is expected to maintain that internal environment for decades
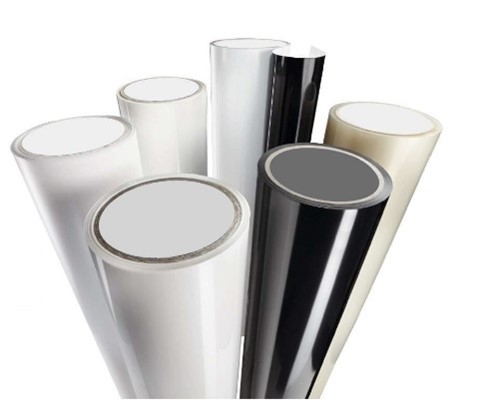
Under that is the backsheet, which acts as the final barrier on the rear of the module. It’s usually a multi-layer polymer designed to provide electrical insulation while resisting moisture, UV exposure, and temperature cycling. Some modules replace the backsheet with a second layer of glass, creating a glass-glass design that can improve durability, though it comes with added weight.
Finally, attached to the back is the junction box, where the electrical output from the module is collected and routed out into the system. Inside are bypass diodes, which allow current to flow around shaded or underperforming cells, preventing hot spots and maintaining overall performance. The internal wiring from the cell strings terminates here, and from this point, cables carry the DC electricity to the inverter or microinverters.